Tuesday, November 20, 2012

Twin Tuesday II

My first Twin Tuesday post was a fun fact post...now here's one that's a little more personal...

The story of our twins.  Here's how we found out:

We have two beautiful, bright, funny little girls.  This spring we got a surprise that we were pregnant again.  My response, "Really?  REally?  REALLY?!?".  A little panicked at the idea of having 3 kiddos under the age of 3. As my pregnancy progressed it turned out to be a lot harder than my first two.  I was much sicker than I had ever been with my girls, I was soooooo tired, and I was bigger faster.  My husband and I thought, "okay, must be a boy this time around".  The doctor said, "Well, it's your third pregnancy and the normal pregnancy symptoms may be increased". 

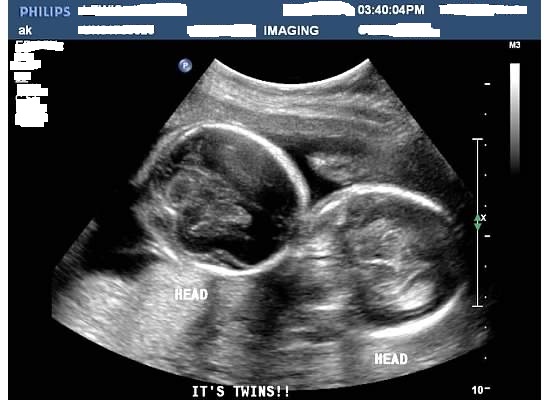
  Finally, at 20 weeks, we were scheduled for our gender reveal ultrasound.  Since my pregnancy had been relatively healthy up to this point, this was our first ultrasound.  Upon laying down and revealing my very round tummy, the tech asked if this was our first ultrasound.  Yes.  Then she put the wand to my tummy to be able to see into the world known as my belly.  I couldn't see the screen, but my husband could at the start.  I watched him as his expression became one of confusion.  He is really good at picking out what's what in an ultrasound (me, it takes a while to figure it out).  So his look caused some alarm.  Then the tech asked again, "Are you sure this is your first ultrasound".  Ummm, yes!  Who would forget an ultrasound?  "Is everything okay?  Is the baby okay?"  Then the tech threw out the news, "You know you're having twins, right?"  Shock!  "Are you kidding?"  No, she doesn't joke about that kind of stuff.  Then my dear husband said, "I thought I saw two heads!"  That explained his confused look.  He gave me a kiss, squeezed my hand, and the tech turned the monitor so I could see that sure enough there were two little babies inside my tummy.  I laughed, I cried, I asked, "Really?" like a thousand times...that seems to be my word for this pregnancy.
   During the ultrasound we found out that we were having 2 little boys.  Now we'll be parents of what most people keep calling, the "perfect" scenario.  Two girls and two boys.  We are over the shock period now and are just elated.  Not niave though, we're semi-aware of how much work it's going to be but are still looking forward to the arrival of our boys.
 Telling our family was the really fun part...

Tuesday, November 13, 2012

Twin Tuesday

  A little change of pace from my normal (infrequent) posts....I thought I'd write a little about having twins.   I'm surprised that there isn't a ton of information about having twins out there, because it's more common now to have twins than ever before.
  Here's some fun things to know about twins:

-About one in 30 births are twin births...
-From 1980 to 2009 the rate of twin births increased by 76%
-The increase may be due to the increase use of fertility drugs, the age of women having children being older (in their 30's rather than 20's), and other unknown attributes...I have my own theory here.
-Fraternal twins, NOT identical twins,  are genetic
-Twins are a genetic characteristic passed on only by the mother's side...(Sorry, Dad's don't get the credit for having twins)
-Identical twins are formed from one egg that splits...Fraternal twins come from two eggs that are fertilized at the same time.
-The term twin derives from a German word twin or twine which means "two together"
-The average time between delivery of the first twin and the second twin is 17 minutes
-Most twins are born between 28-35 weeks (average singleton is born at 37 weeks)
-William Shakespeare fathered twins, a boy and a girl...

Just some fun food for thought about twins...

Here's some fun articles to read...
TWINS™ Magazine Multiples Facts & Statistics
Twin Births in  the U.S., Like Never Before
 Trouble Doubled Blog

Sunday, October 28, 2012

Project Marathon: Christmas Tree Skirt Tutorial

 
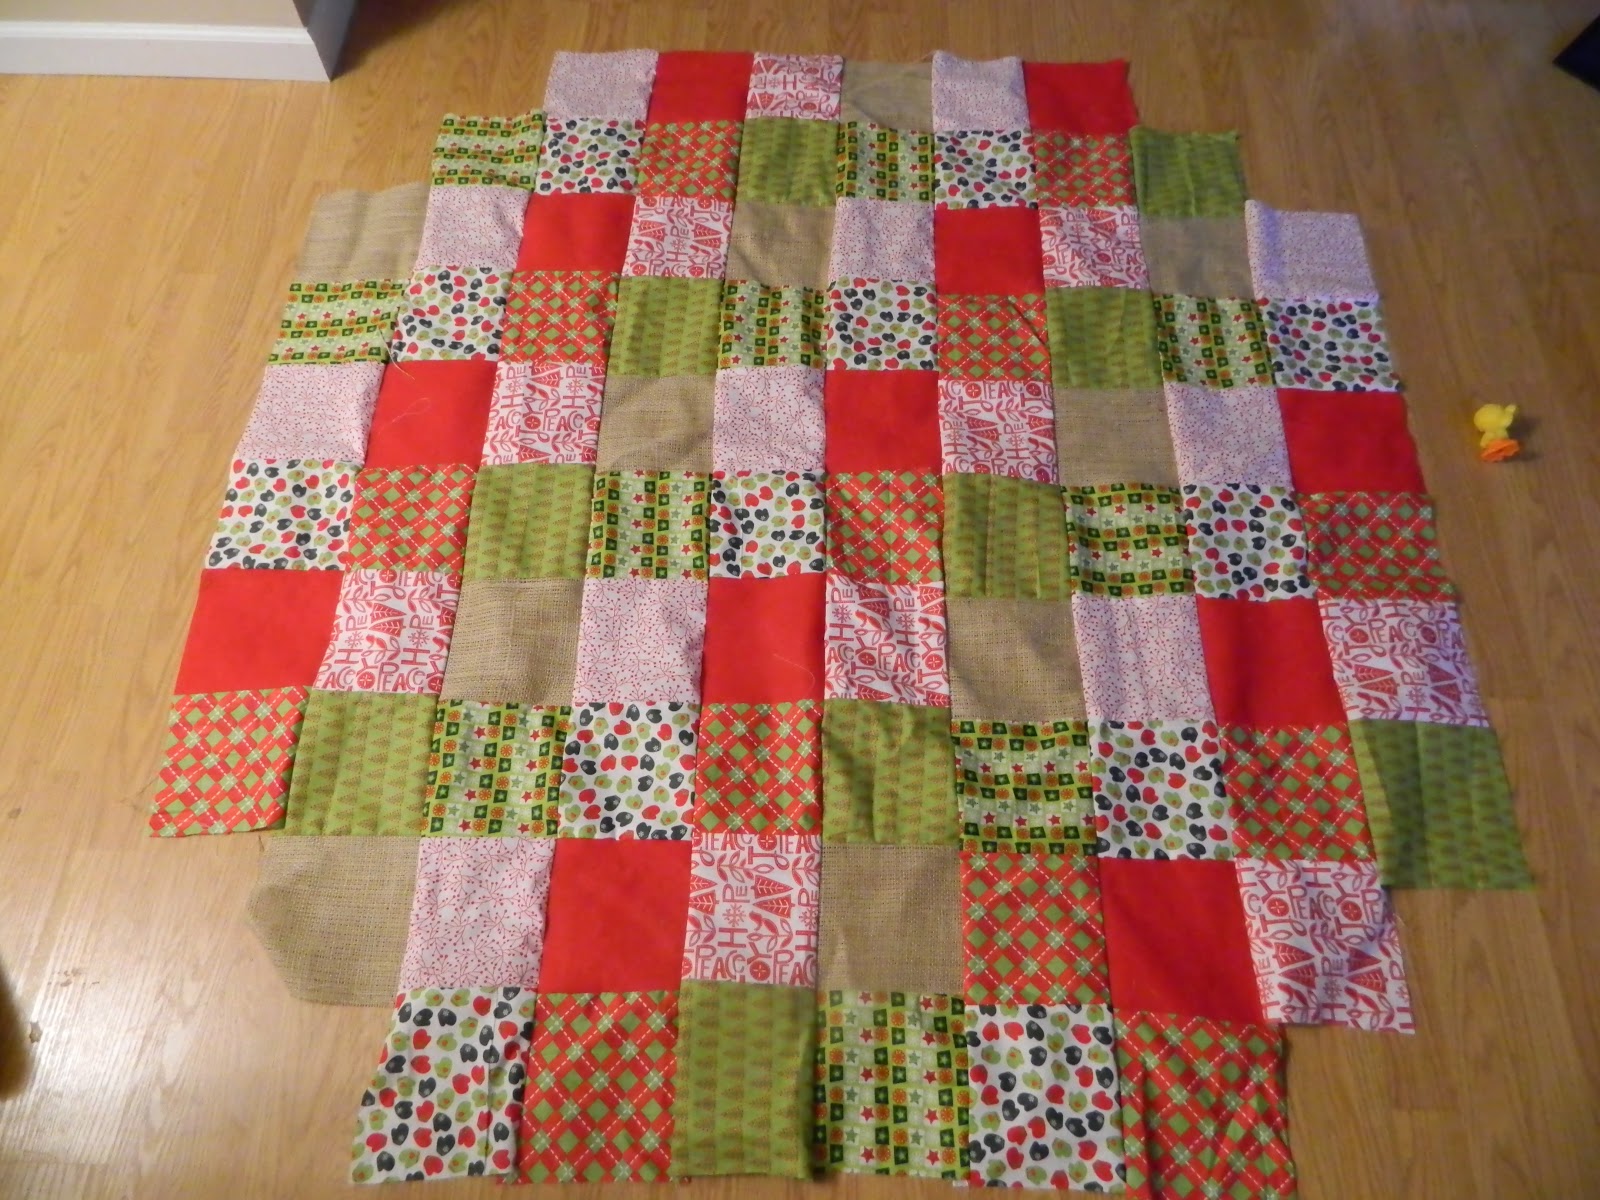
Step 1:  Pick out your fabric and plan a pattern for your skirt.  I did a pattern that included 7 in squares of 6 different types of Christmas Fabric, Burlap, and Felt.  See below pictures for layout.  I cut and used 88 squares for my tree skirt.  I sewed 6 rows of 10, 2 rows of 8, and 2 rows of 6.  Then sewed the rows together.  Easy Breezy.
 
See my layout?...Love it!  Used the fabric from our stockings.
 
 
Step 2: Cut a circle for the bottom fabric.  I used an old tree skirt my mom made as a pattern.  It's not perfect but it worked.

Step 3(below): Lay your top and bottom pieces together (right sides together, wrong sides out).  Pin the two in place so that you are ready to sew them together.  Make a 1/2'' seem around the circle.  Then cut off the excess fabric.


Step 4:  Fold the tree skirt into fourths, so that you have a straight line to mark on one of the edges.  (This would be like drawing the radius on your skirt from the center to the edge of the circle). Mark the bottom (keep in mind this is the inside of your skirt and the markings won't show after you turn it right side out) of the tree skirt.


 Step 5: Unfold your skirt and mark a circle in the center of your skirt. (This is where the tree trunk will be).  I used a bowl for my circle.


 Step 6:  Sewing.  You will be sewing from the circle's edge to the small circle you drew in the center of the skirt along the radius line you first drew.  (Does that make sense?)  Do not sew on the line but 1/2'' to the left or right of the line.  See picture below.  Hope that helps...
 Continue sewing 1/2'' outside the radius line and around the small center circle's line.
 Continue sewing back down the other side of the radius line until you get to about 8' or more' from your outer seem.  This will be the hole that you will use to turn your tree skirt right side out. (Not sure if you can see that in the pictures below...tried to zoom in but my flash is awful).


 Step 7: Starting from the edge of your tree skirt, cut along your radius line and around your center circle line.  See below.

Step 8 (Finale!): Turn your tree skirt right side out.  Sew up the hole.


And you are done!  Ready for Christmas yet? 
Note: I personally will be adding some type of lace or frill to the edge of my skirt.  This may happen later...


Monday, September 24, 2012

Project Marathon-Look for Upcoming Posts!

Sadly, I've neglected my blog lately...but with good reasons.  Being pregnant with twins, my doctor recommended that I finish all big projects before 28 weeks!  Deadline: tomorrow!  Yikes!  Here's the projects I'll be posting once I've finished them up:

1.) Big Girl's Quilt
2.) Aprons
3.) Christmas tree skirt
4.) Big Sister Bag
5.) Little Burp Rags and Matching Monogram Blankets
6.) Stick Horses
7.) Crib Bumpers
8.) Little Twin Boys' Nursery Pictures

Plus, MORE FREEZER MEALS!!!!

So, keep checking back!  I'll be blogging more after these projects are finished!  The trick is to get them done secretly when my 3 year old isn't peeking since most of these projects are birthday and Christmas presents for the family.

Friday, September 7, 2012

Burlap Monogram Christmas Stockings DIY


Since we are expecting our twin boys at Christmas time, I figured I should probably make them stockings for Santa to bring them some fun goodies on Christmas Eve.  I made the rest of our stockings last year and luckily thought ahead enough to purchase fabric for new additions later.  I loved the way they turned out and hope you do too.  What I love best is that the burlap is forgiving.  If you don't cut it just perfect, it moves and stretches.  And felt is great because you don't have to worry about it's hem too much.

First Step:
Purchase your material.  Figure out how big you want your stockings and multiply that by how many you're going to be making.  Don't forget there's a front and a back side to your stocking.  I bought/ gathered:
-3 yards of Red felt (I wanted to make sure I had enough for a tree skirt later...just started working on that...keep you posted).
-3 yards of burlap (this left me some extra too)
-1 yard of Christmas material ( you could buy 1 yard each of different Christmas material if you want to make a matching tree skirt too or you could just get one yard total and mismatch or whatever)
-a spool of rick rack (ribbon for hanging the stockings)
-Red thread
-buttons
-a good pair of scissors
-tacky craft glue
-a needle

Second Step:
Cut your red felt the size you want your stockings (I used an old Christmas stocking as a pattern).  Cut a front and a back (it's best to fold your felt in half and just cut the front and back together).

Now cut your burlap stockings (front and back-fold your material in half) about 1/4" larger.  Your felt stockings are the lining and the burlap is the outside stocking (yes, this is a two layer stocking...burlap is itchy and it gives, wouldn't last long as a Christmas stocking on it's own...so, I made a felt lining).  Tip:  a good way to cut burlap straight is to pull one of the threads tight and then cut along the thread (it makes the line or thread more visible).

Once you've cut your lining stockings and your burlap stockings, cut a 3" x 3" square of felt.  This will be your piece that you sew buttons on for the monogram.  

Cut any decorations you'd like out of felt for the top front of the stocking.  I did a heart, tree, star, mittens, holly berry leaves, and a square present then embellished them with buttons and other trimmings.

Lastly, cut about 4-6" x the width of your stocking of your Christmas material.  My stockings were about 8 inches across so I cut my Christmas material at about 6" x 8 1/4". 

Third Step:  Monogram squares
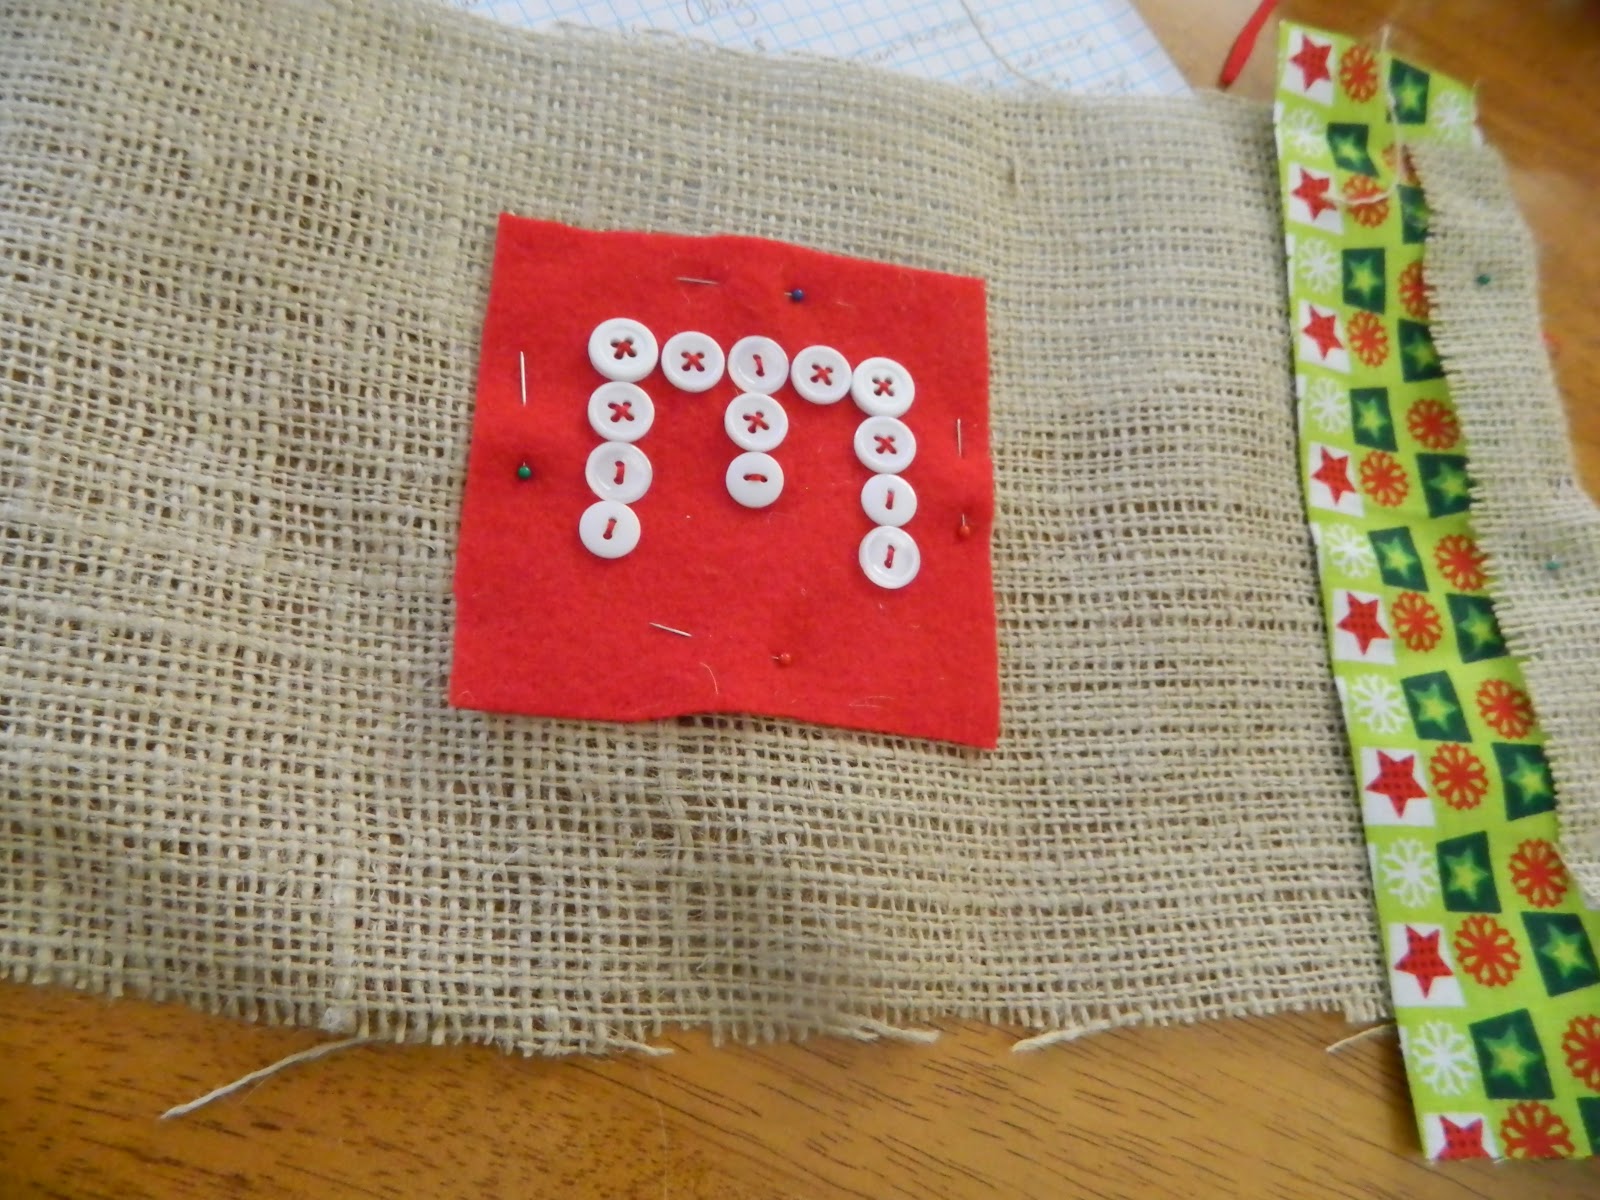
Play with some buttons until you get your letters looking the way you want them to on your red felt square.  Once you have them in place, use tacky glue to attach them to the felt.  After a few minutes they should be dry enough for you to sew them on with needle and thread.


Fourth Step: Sewing
Now it's time to sew your red felt stockings front to back.  You won't have to flip the stocking inside out, I left mine just the way I cut them with a small hem.  Remember not to sew the opening shut.

Sew the top hem of the back piece of burlap.  The hem will be hidden inside your stocking once you sew the back to the front so don't worry about trimming it up.
(I tried to upload a picture of this but no luck, here's the next best thing)
(note the back-the burlap on the left in the picture- that's what I meant by making a hem)

Fifth Step: Pinning
Take your Christmas fabric and fold it over in half hot dog style, then fold where you would do a seam over (I was lazy and didn't hem my Christmas fabric because it will be hidden).  Tuck it on to the top of your front burlap stocking and fold over a piece of burlap about 1/2" in size.  (I know this sounds confusing, just look at the picture it's worth a million words).  Pin your burlap and Christmas fabric in place.

Now, pin your monogram square and embellishment (your tree, star, gift, snowflake, holly berrys or whatever you are clever enough to come up with) in place.
Ready for the next step?

Sixth Step: Sewing the burlap

Start by sewing your monogram square to the burlap.
 
Next sew on your embellishments to the front of the stocking.
Hand stitch any buttons or ribbon onto the embellishment.  (IN the picture you see a square, after I sewed it on I made a bow out of rick rack and sewed that to the top of the square with a button to make a present)

That's it for the front for now....

More pinning, then more sewing...almost done though, wooohoooo!  Pin the front of your stocking to the back of your stocking wrong sides out.
 
Now, you can sew your burlap stocking sides together, I left about a 1/4" hem.

Seventh step: Finishing touches
Sew on about 2 inches or so of rick rack or ribbon to the  side hem of the burlap stocking. (see below)  I made several passes with the machine to ensure that the ribbon would hold up our stockings.

 
Now it's time to flip your burlap stocking right side out.  Then tuck the red felt lining inside the burlap stocking.(Not a very good description or picture...hopefully, you get the idea though).
 
Congratulations!  You are done!  Now you just have to do that a few more times to make one for each member of your family...  good luck!  Let me know if you have questions!


Thursday, August 30, 2012

Party Friday

Joined two parties this week:
Little Becky Homecky  (note to self:  don't put my name for the name of the project!  LOL.  Anyone else do that before?)
One Artsy Mama

Check 'em out.

Tuesday, August 28, 2012

Shrinky Dink Pin is a Win!

I don't know about you but I totally remember making shrinky dinks when I was a kid.  Today we tried out a free and easy way to do it at home using this pin.

Here's ours, we only had one permanent marker color otherwise we would have made much cooler ones today: