
First Step:
Purchase your material. Figure out how big you want your stockings and multiply that by how many you're going to be making. Don't forget there's a front and a back side to your stocking. I bought/ gathered:
-3 yards of Red felt (I wanted to make sure I had enough for a tree skirt later...just started working on that...keep you posted).
-3 yards of burlap (this left me some extra too)
-1 yard of Christmas material ( you could buy 1 yard each of different Christmas material if you want to make a matching tree skirt too or you could just get one yard total and mismatch or whatever)
-a spool of rick rack (ribbon for hanging the stockings)
-Red thread
-buttons
-a good pair of scissors
-tacky craft glue
-a needle
Second Step:
Cut your red felt the size you want your stockings (I used an old Christmas stocking as a pattern). Cut a front and a back (it's best to fold your felt in half and just cut the front and back together).
Now cut your burlap stockings (front and back-fold your material in half) about 1/4" larger. Your felt stockings are the lining and the burlap is the outside stocking (yes, this is a two layer stocking...burlap is itchy and it gives, wouldn't last long as a Christmas stocking on it's own...so, I made a felt lining). Tip: a good way to cut burlap straight is to pull one of the threads tight and then cut along the thread (it makes the line or thread more visible).
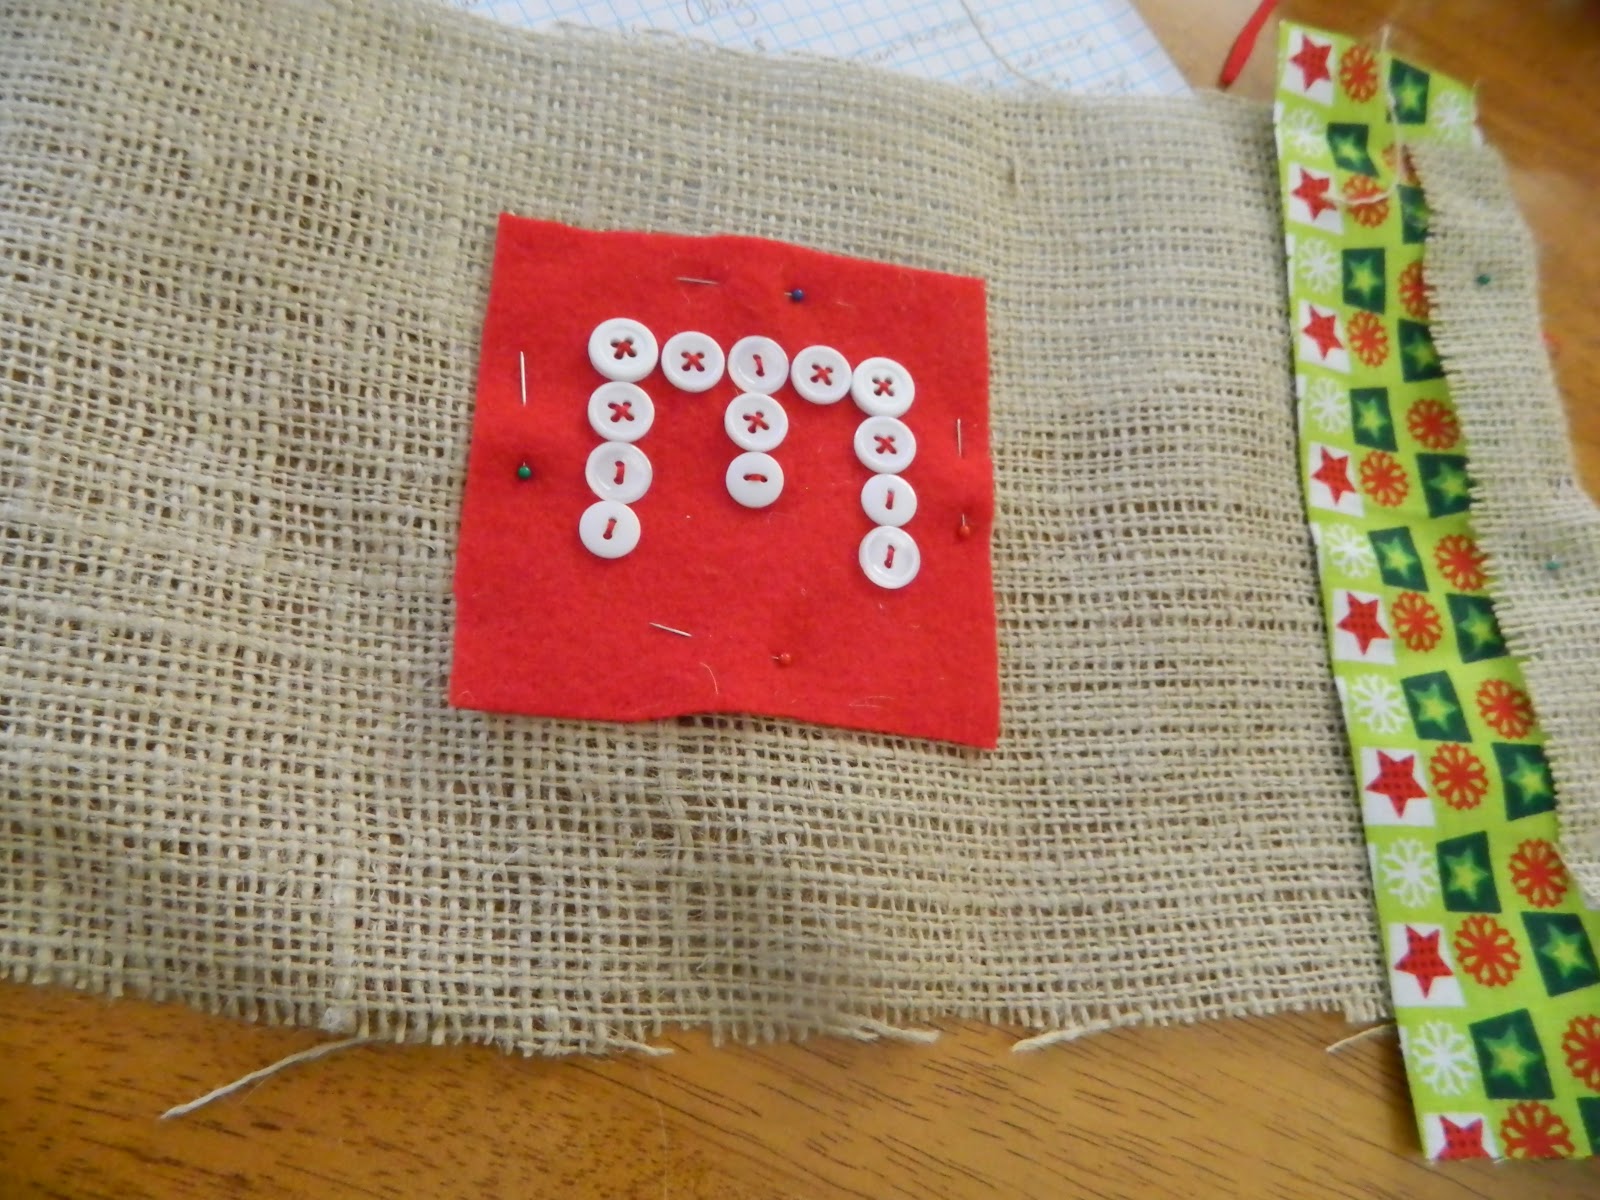
Once you've cut your lining stockings and your burlap stockings, cut a 3" x 3" square of felt. This will be your piece that you sew buttons on for the monogram.
Cut any decorations you'd like out of felt for the top front of the stocking. I did a heart, tree, star, mittens, holly berry leaves, and a square present then embellished them with buttons and other trimmings.
Lastly, cut about 4-6" x the width of your stocking of your Christmas material. My stockings were about 8 inches across so I cut my Christmas material at about 6" x 8 1/4".

Third Step: Monogram squares
Play with some buttons until you get your letters looking the way you want them to on your red felt square. Once you have them in place, use tacky glue to attach them to the felt. After a few minutes they should be dry enough for you to sew them on with needle and thread.


Fourth Step: Sewing
Now it's time to sew your red felt stockings front to back. You won't have to flip the stocking inside out, I left mine just the way I cut them with a small hem. Remember not to sew the opening shut.
Sew the top hem of the back piece of burlap. The hem will be hidden inside your stocking once you sew the back to the front so don't worry about trimming it up.
(I tried to upload a picture of this but no luck, here's the next best thing)

(note the back-the burlap on the left in the picture- that's what I meant by making a hem)
Fifth Step: Pinning
Take your Christmas fabric and fold it over in half hot dog style, then fold where you would do a seam over (I was lazy and didn't hem my Christmas fabric because it will be hidden). Tuck it on to the top of your front burlap stocking and fold over a piece of burlap about 1/2" in size. (I know this sounds confusing, just look at the picture it's worth a million words). Pin your burlap and Christmas fabric in place.

Now, pin your monogram square and embellishment (your tree, star, gift, snowflake, holly berrys or whatever you are clever enough to come up with) in place.
Sixth Step: Sewing the burlap
Start by sewing your monogram square to the burlap.

Next sew on your embellishments to the front of the stocking.

That's it for the front for now....
More pinning, then more sewing...almost done though, wooohoooo! Pin the front of your stocking to the back of your stocking wrong sides out.

Now, you can sew your burlap stocking sides together, I left about a 1/4" hem.

Seventh step: Finishing touches
Sew on about 2 inches or so of rick rack or ribbon to the side hem of the burlap stocking. (see below) I made several passes with the machine to ensure that the ribbon would hold up our stockings.


Congratulations! You are done! Now you just have to do that a few more times to make one for each member of your family... good luck! Let me know if you have questions!

Look at all the stockings! You're a family of six soon! Crazy. They turned out really cute and I love the idea of gluing on the buttons before you stitch them; much easier I'm sure that way! Couldn't figure out who the M was for for a while... but I got cha now mama!
ReplyDeleteThanks! I know six seems kinda crazy!!!!
Delete